Creating a visually appealing website is crucial for engaging visitors and improving the user experience. One way to add a personal touch is through the customization of link color in WordPress. If you’re new to WordPress or simply looking to refresh your site’s look, altering link colors can make a significant impact. This guide will show you how, even with little to no coding experience and at the end of the article, you’ll be able to change the link color in your WordPress. In this article we will guide you through step-by-step process to change link color in WordPress.
Understanding CSS
CSS, or Cascading Style Sheets, is the styling language used to design web pages. It enables you to set the visual properties of your website’s elements, such as text, images, and links. By customizing CSS, you can specify the colors of your links both in their normal state and when hovered over or visited.
Identifying the CSS Class or ID for Links
Before changing a link’s color, you need to identify the specific CSS class or ID associated with it. Here’s how to do that:
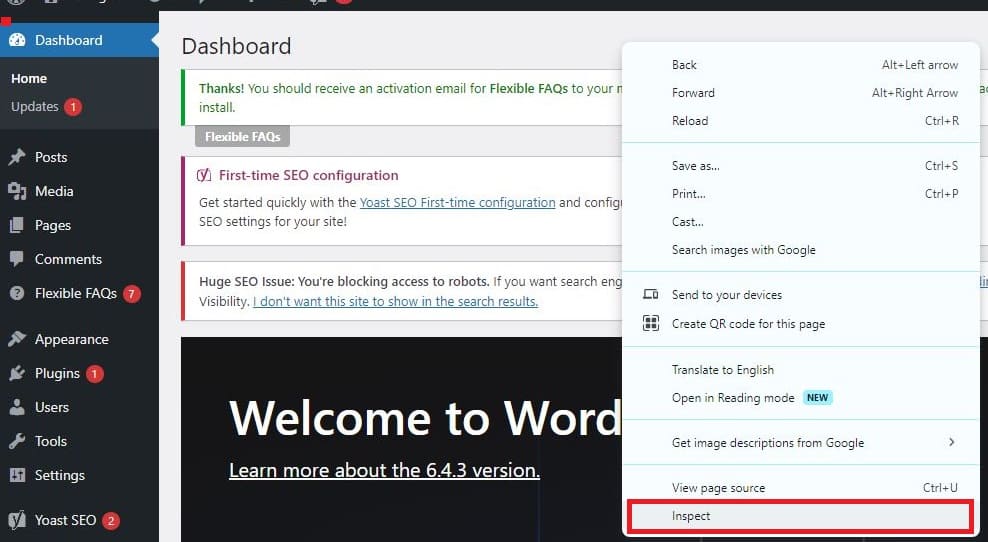
- Right-click on a link on your WordPress site and select ‘Inspect‘ or ‘Inspect Element‘ depending on your browser.
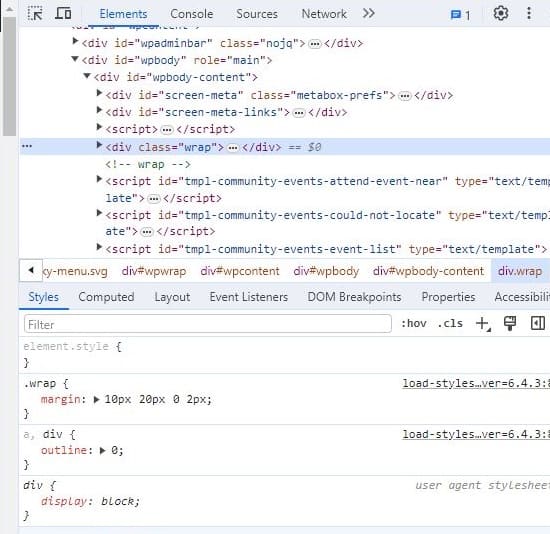
- This will open the developer console, which shows the HTML markup and related CSS.
- Look for the HTML tag for the link `<a>` and identify the CSS class or ID, which might look like `.link-class` or `#link-id`.
1. Modifying the CSS Code
With the CSS class or ID in hand, you can now proceed to modify your link color. Here’s a basic walkthrough:
- Go to your WordPress Dashboard.

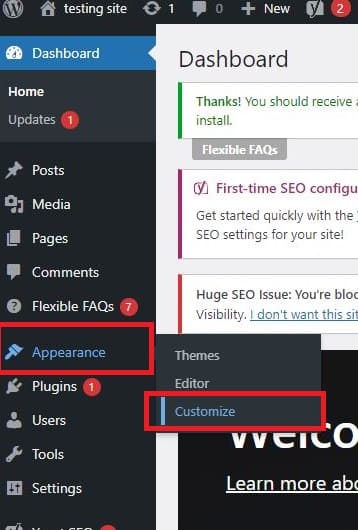
- Navigate to ‘Appearance‘ and then ‘Customize‘.
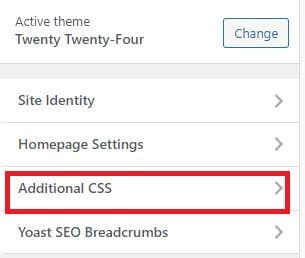
- Open the ‘Additional CSS‘ section.
- Type in the CSS code to change the color. For example:
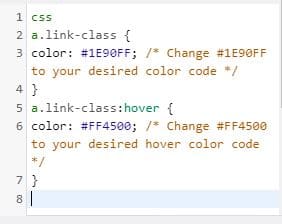
- Click ‘Publish‘ to save the changes.

2. Using a WordPress Plugin
If tinkering with CSS sounds daunting, you can use a WordPress plugin designed for customization:
- Install a plugin like ‘WP Add Custom CSS‘ or ‘Simple Custom CSS and JS‘.

- Navigate to the plugin’s menu in your WordPress Dashboard.

- Enter the CSS code to adjust your link color, as shown in the previous section.

- Save or publish your changes.

Testing and Previewing Changes
After you’ve applied your changes, it’s essential to preview your site to ensure the links appear as expected. Test on different devices and browsers to verify consistency. Additionally, check your links’ visibility against various background colors to ensure readability.
Conclusion
To change link color in WordPress is a simple task and an effective way to enhance your website’s appearance and user experience. Whether through direct CSS editing or using a plugin, you have the power to make your site stand out. So go ahead and experiment with different hues and saturations—your website’s design is only limited by your creativity. Enjoy bringing more color to your user’s interactions!


