WordPress is the engine behind a significant portion of website on the internet. Its vast library of plugins is one of the main reason for its popularity. Plugins can transform your sites into almost anything you can imagine, from a simple blog to an e-commerce. But the real power lies in knowing how to connect these tools. This comprehensive guide will walk you through the essential steps to activate, and install plugins in WordPress.
The Web of WordPress Plugins
Install plugins in WordPress that add functionality to your websites. They can range from the simple, likes a contact form, to the complex, like an e-commerce solutions. The ability to extend WordPress is a significant reason for its ubiquity. However, more than 59,669 free plugins are available; the total volume can be overwhelming for a first-time user.
Step1: Accessing the Plugins Section
The first step to giving your WordPress site new capabilities is accessing the plugins section. To do so:
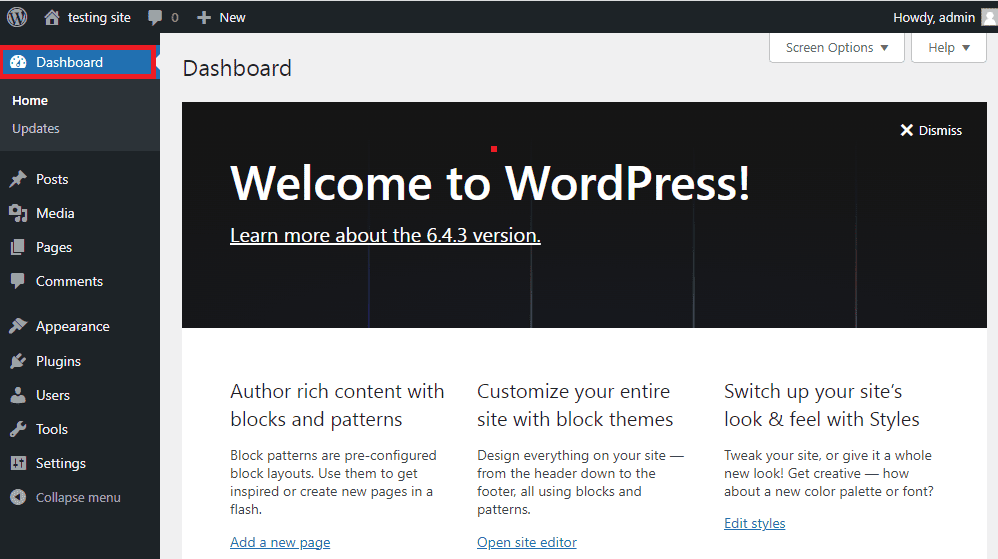
- Login to the WordPress dashboard.
- Click on the “Plugin” tab on the left-hand sidebar.
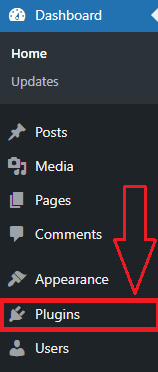
This will takes you to the main Plugins page, where you can manage your installed plugin and find new ones to add.
Step2: Choosing and Searching for Plugins
With access to the repository, it’s now time to find the plugins that can best amplify your website’s capabilities.
WordPress Plugin Repository
The official WordPress Plugin Repository is a treasure trove of tools. You can search for plugins right from your dashboard:
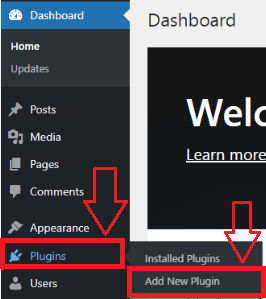
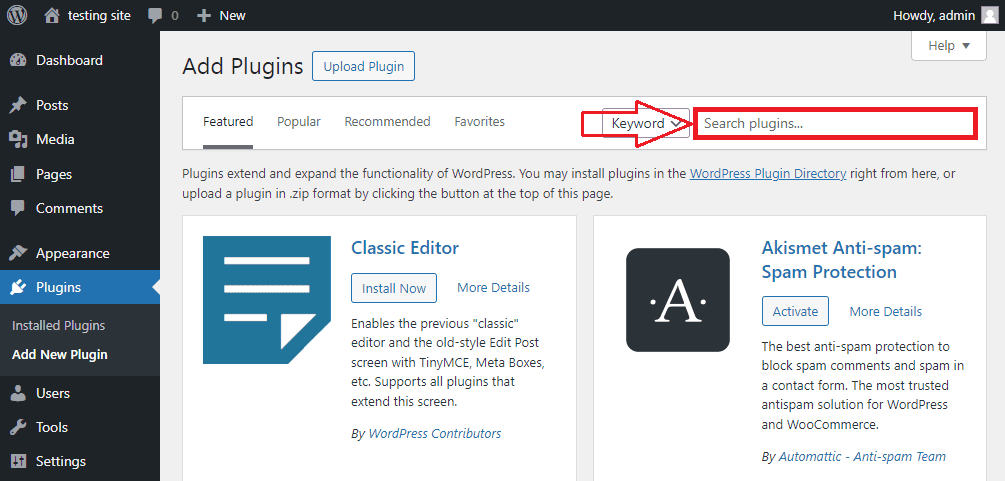
- Click on “Add New plugin.”
- Use the search bar to find a plugin by name, keyword, or function.
Selecting the Right Plugin
When choosing a plugin, consider the following:
Ratings and Review:
Higher-rated plugins with many positive review typically indicate a more consistent tool.
Active Install:
A high number of active installation suggests the plugin is popular and well-used.
Last Updated:
Regular updates are critical for security and compatibility reasons.
Compatibility with Your Version of WordPress:
Ensure the plugin is compatible with your current WordPress version.
Step3: Installing a Plugin
Having found the desired plugin in the repository, installing it is straightforward.
Installing from the Repository
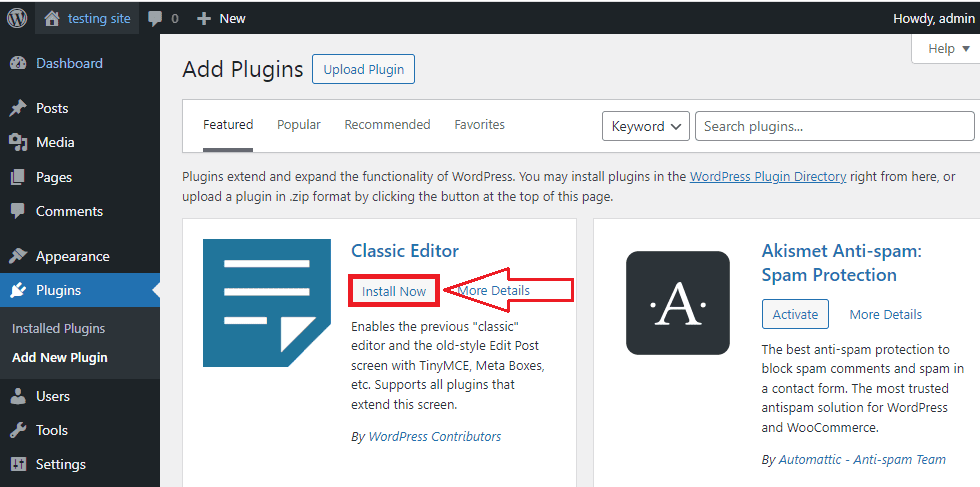
- Click “Install Now” on the plugin you want.
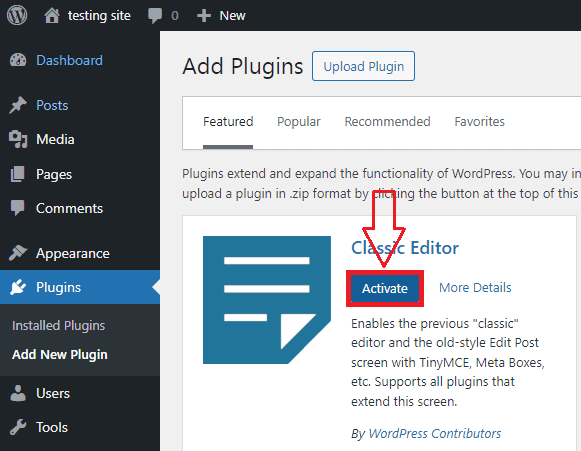
- Once installed, the button changes to “Activate.” Click it to turn the plugin on.
Uploading a Plugin from an External Source
For plugins not available in the repository, you’ll need to download the .zip file from the source:
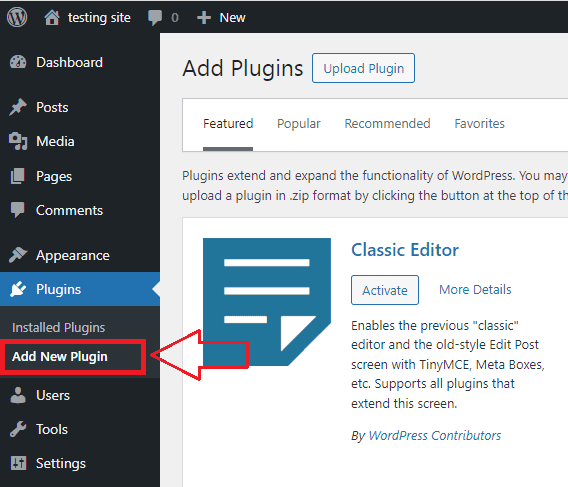
- Click “Add New” to go to the plugin page.
- Next to the title, click “Upload Plugin.”
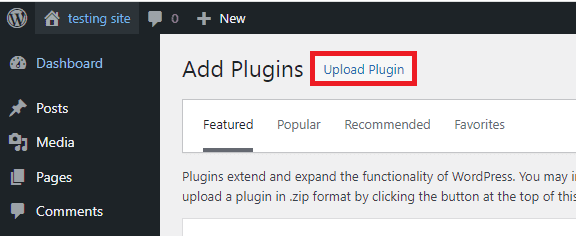
- Choose the zip file and click “Install Now.”
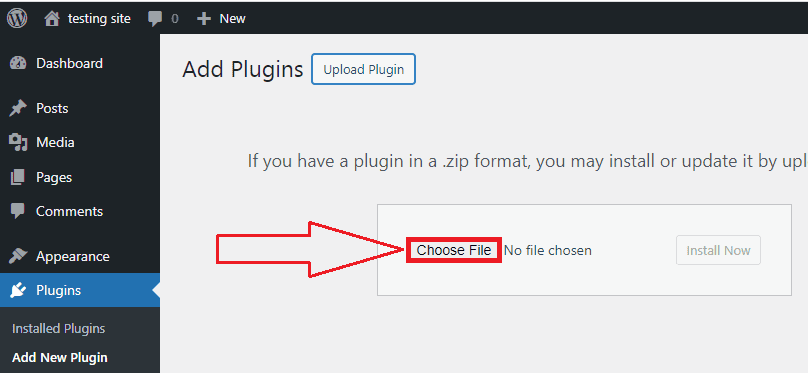
- After installation, activate the plugin.
Conclusion:
With installing a new plugins under your belt, the WordPress world is yours to explore. Always be mindful of the plugins you choose to install, keep them updated with the latest version, and sometimes review your list for optimization. By taking these steps, you are well on your way to harnessing the full powers of WordPress vibrant plugin ecosystem.
Install plugins in WordPress is the key to unlocking the full potential of the platform. By learning how to find, install, and manage plugins, you’ll be able to craft a website that not only looks great but also functions exactly the way you need it to. Whether you’re a blogger looking to add new features to your sites or an entrepreneur building an online store, WordPress plugins are the tools that can turn your vision into a reality.
